Why an Online Store — Not Just Social DMs?
Many sellers think building an online store is a "big thing" that requires technical expertise, a lot of time, and maybe money. The reality is completely different.
With sellX, your full store is ready in 10 minutes — no technical experience needed, no money required to start.
Why you need an online store: - Customers can order any time, even while you sleep - Their details are automatically recorded without you typing anything - Your store represents you professionally 24 hours a day
Before You Start: Prepare These Things
You don't need much: - Email to register - Product photos (already on your phone) - Product prices - WhatsApp number for customer contact
That's it. No credit card, no technical skills, no design.
Step 1: Create Your Account (2 minutes)
Go to sell1x.com/signup and register with: - Your full name - Your email - A password
After registration, you go straight to the dashboard.

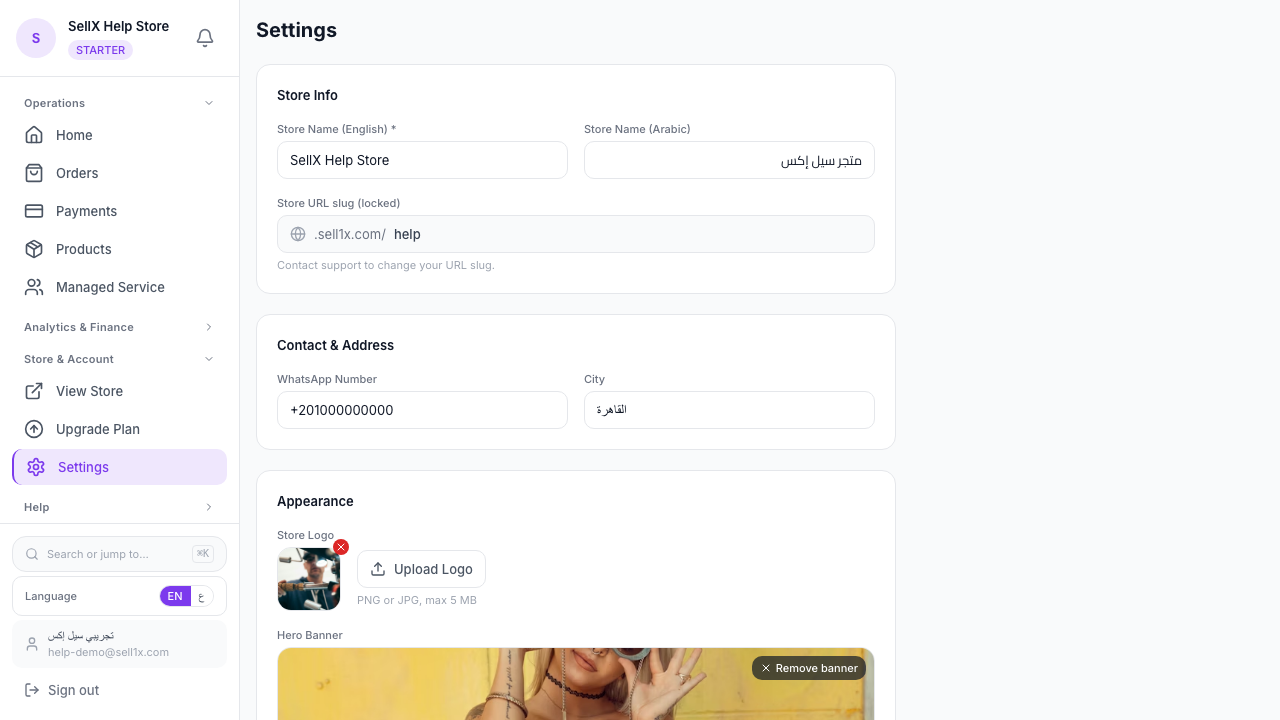
Step 2: Set Up Your Store Settings (2 minutes)
Go to Settings and add:
Store Name Choose a name that reflects what you sell. Example: "Dina's Abayas" or "Reem's Accessories."
Logo If you have a logo, upload it. Even a simple image makes a difference. You can add a logo later.
WhatsApp Number Important — your customer can reach you if they have a question.
Store Description One or two sentences describing what you sell. "Premium women's abayas and clothing. Nationwide delivery."
Step 3: Add Your First Products (5 minutes)
How to Add a Product
- Click "New Product"
- Add the product name
- Upload one or more photos (directly from your phone)
- Set the price
- Add a short description
- Click "Save"
Hit the 10-minute mark? Your store is ready.

Product-Adding Tips
Photos: Upload more than one photo per product. Front view + details + side view.
Prices: Write the full price including any taxes. Avoid "price on inquiry" — customers want to know the price immediately.
Description: Even 3 sentences is enough: materials, size or dimensions, and any important information.
Step 4: Get Your Store Link
After adding a product, sellX gives you: - Your store link: yourname.sell1x.com - A QR code you can print and put in packaging or catalogs
Step 5: Share Your Store
On Instagram - Put the link in your bio - In every post or Story, say "Order from the link in bio 👇"
On WhatsApp - Put the link in your status - When someone asks about a product, send them the direct product link
In Your Packaging - Print the QR code and include it with every order — satisfied customers will come back and reorder easily
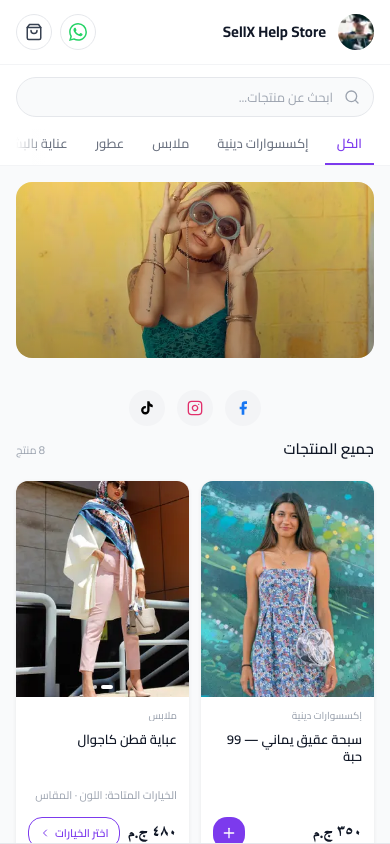
What Happens When a Customer Visits Your Store
- They see all products with clear photos and prices
- They tap the product they like
- They choose quantity and options (if you have colors or sizes)
- They enter their name, phone, and address
- They confirm the order
And you find the order in your dashboard immediately — with all customer details ready.
Common Questions
Do I need a separate website? No. sellX gives you everything in one place.
Will customers know how to use the store? Yes. The experience is designed to be very simple, even for people who don't browse websites often.
What if I have limited stock? You can set a quantity for each product. When it runs out, it automatically shows as "Out of Stock."
The Bottom Line
10 minutes. 5 steps. Store ready.
There's no reason to postpone this to tomorrow. Every day without an organized store = potential orders you're missing.