Why Your Domain Matters
Every sellX store comes with a free address like yourstore.sell1x.com — and that works perfectly. But when you're building a brand, a domain you own says something different:
yourbrand.comlooks like an established business, not a page on someone else's platform.- Buyers remember it, type it, and trust it.
- Your ads, packaging, and cards all point to your name.
If you already own a domain (or buy one for a few dollars a year), you can put your store on it in minutes.
Custom domains are available on the Growth plan and above.
Before You Start
You need a domain you control — bought from a registrar like Namecheap, GoDaddy, or Cloudflare. You'll add two small DNS records there. If you don't have a domain yet, buy the apex (the plain yourbrand.com, no www) first.
Step-by-Step Setup
1. Open Domain settings
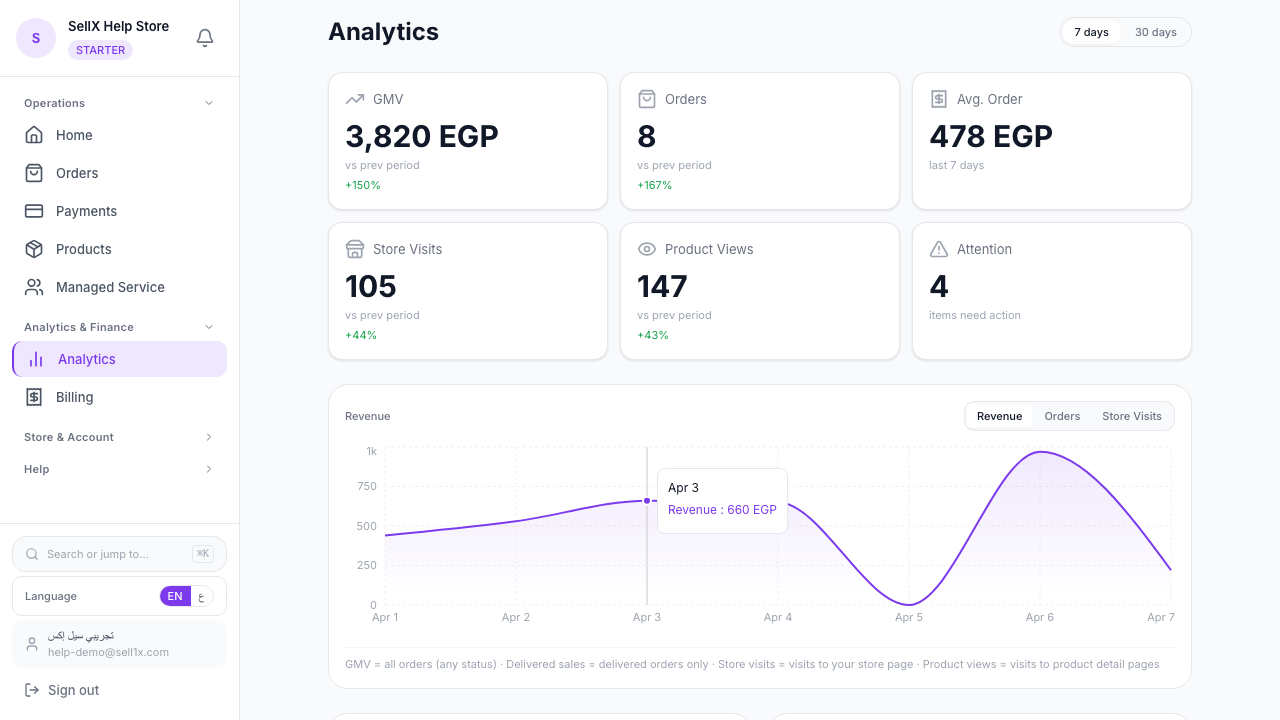
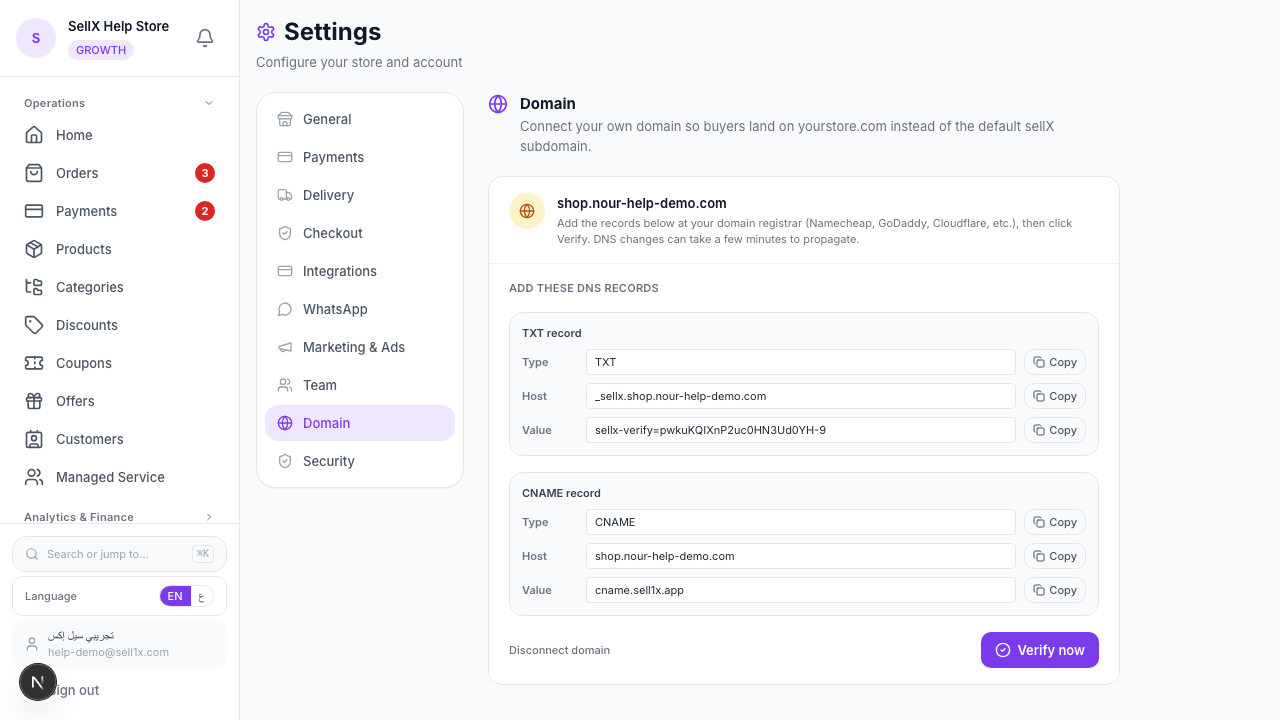
From the dashboard, open Settings, then click the Domain tab.
2. Enter your domain
In Your domain, type the apex form — no www, no https://, no path. Just yourbrand.com. Click Connect domain.
3. Add the DNS records
sellX now shows you two records to add at your registrar:
- A TXT record — proves you own the domain. Host looks like
_sellx.yourbrand.com, with a value sellX gives you (sellx-verify=...). - A CNAME record — points your domain at sellX's hosting (
cname.sell1x.app).
Copy each value with the copy button, log into your registrar's DNS settings, and add both records exactly as shown.
4. Verify
Back in sellX, click Verify now. DNS changes can take a few minutes to spread — if it says "no record found yet," wait a moment and try again. Once verified, sellX issues an SSL certificate (the padlock) and your domain goes live.
What Happens Next
When the domain is verified and live, buyers reaching yourbrand.com land on your store, with HTTPS and your brand in the address bar. Every link you share — product pages, tracking links — now carries your name.
Your free *.sell1x.com address keeps working too. If you ever disconnect the custom domain, buyers simply fall back to it.
Tips
- Use the apex, not www. Enter
yourbrand.com, notwww.yourbrand.com— sellX handles the canonical form. - Give DNS a few minutes. Verification failing on the first try is normal; DNS propagation isn't instant.
- Double-check the value. A "value doesn't match" error almost always means a copy-paste slip in the TXT record — re-copy it.
- Keep your plan active. Custom domains need Growth or above; if you downgrade, you get a grace window before the domain stops routing.
The Bottom Line
A custom domain is the cheapest upgrade to how serious your store looks. Two DNS records, one click to verify, and your brand lives at its own address.
Start on sellX and connect your domain ←
Read next: How to make your store look professional and win customer trust